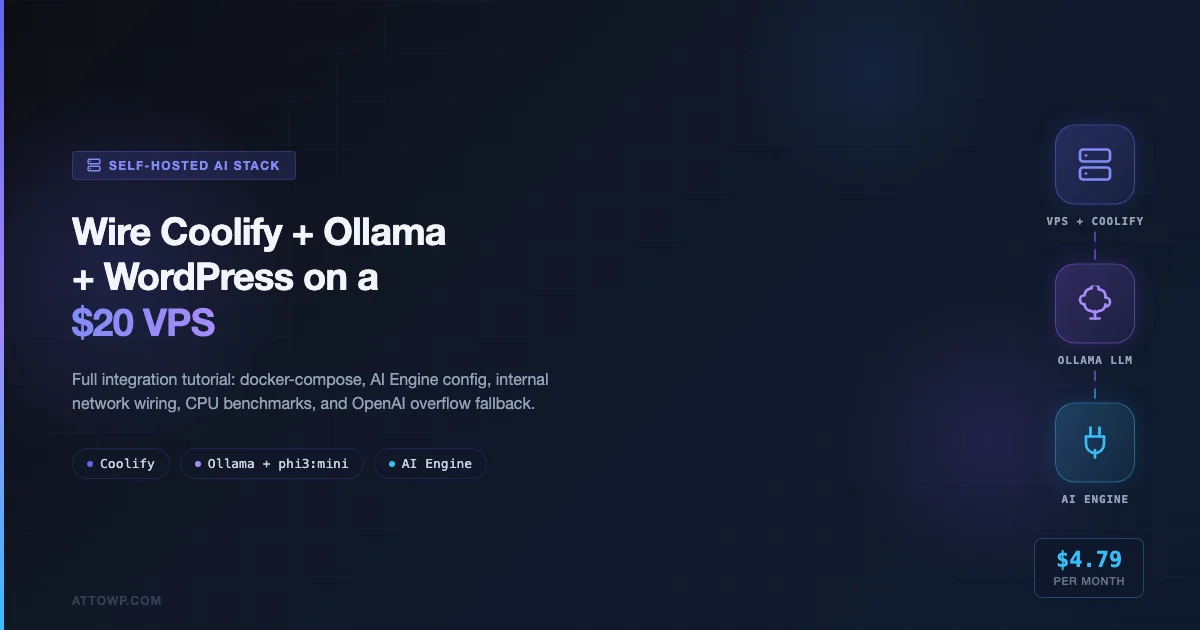
You can run a fully self-hosted WordPress AI stack on a $20 VPS. No OpenAI API key required, no token bills, no data leaving your server. This tutorial wires three pieces together: Coolify for application deployment, Ollama for local LLM inference, and the AI Engine plugin as the bridge into WordPress. If you’ve already read the Coolify primer, the Ollama setup guide, and the self-hosted AI overview, this is the glue that connects them into a production-ready stack.
What You Are Actually Building
The end state is a single $20 Hetzner CX22 (or equivalent DigitalOcean Basic) running three containers on a shared Docker bridge network:
- WordPress (standard Apache container) - your CMS
- MySQL 8 - WordPress database
- Ollama - LLM inference server, accessible from WordPress at
http://ollama:11434over the internal bridge network, never exposed to the public internet
Coolify manages the deployment surface: TLS via Let’s Encrypt, container restarts, environment variables, and a dashboard so you don’t SSH in every time you need to restart a service. AI Engine plugin in WordPress points at Ollama’s OpenAI-compatible endpoint rather than the real OpenAI API.
The fallback layer is optional but covered: when Ollama is overloaded (common on CPU-only hardware), you can route overflow requests to the real OpenAI API. This gives you cost control without a hard outage.
Hardware Baseline and What the Numbers Actually Mean
Before touching a terminal, set realistic expectations. The benchmarks below are from a Hetzner CX22 (2 vCPU, 4 GB RAM, shared compute) and a Hetzner CX32 ($14.59/month, 4 vCPU, 8 GB RAM) running phi3:mini and llama3.2:3b respectively, measured with the monitoring commands in Gist file 08.
| Scenario | VPS | Model | Cold start | Warm (tokens/s) | Monthly cost |
|---|---|---|---|---|---|
| CPU-only budget | Hetzner CX22 ($4.79) | phi3:mini (2.3 GB) | 18-24 s | 3-5 tok/s | ~$4.79 + $0 AI |
| CPU mid-range | Hetzner CX32 ($14.59) | llama3.2:3b (2.0 GB) | 9-13 s | 7-10 tok/s | ~$14.59 + $0 AI |
| GPU entry | Hetzner GX26 ($~65) | mistral:7b-instruct-q4 | 1-2 s | 30-45 tok/s | ~$65 + $0 AI |
| Cloud API baseline | Any hosting | GPT-4o-mini | <1 s | ~80 tok/s | Hosting + ~$8-40 AI* |
The $20 VPS breaks even vs. OpenAI API costs at roughly 300,000 to 500,000 output tokens per month, depending on the model tier you would otherwise use. For most editorial WordPress workflows, that threshold is hit within two to four months. The real value is not cost alone: it is data sovereignty, no rate limits, and the ability to run models fine-tuned on your own content.
Step 1: Provision and Harden the VPS
Spin up a Hetzner CX22 or DigitalOcean Basic Droplet ($20/month) running Ubuntu 22.04 LTS. Add a floating IP or configure your DNS before you start - Coolify will request a TLS certificate during setup and it needs the domain resolving to the server’s IP first.
Run the initial hardening script. It installs Docker, sets up UFW, and activates fail2ban:
This opens ports 22, 80, and 443 only. Ollama’s port 11434 deliberately stays closed to the public - it will only be reachable from inside the Docker bridge network. Exposing Ollama to the public internet is the single most common mistake in self-hosted AI setups. There is no authentication on Ollama’s HTTP API by default; treat it as an internal service.
Step 2: Install Coolify
Coolify is the deployment layer. It handles Traefik reverse-proxy configuration, Let’s Encrypt certificates, container lifecycle, and environment variable management through a web dashboard. The Docker fundamentals behind Coolify are the same stack covered in the Docker setup guide - Coolify adds the management surface on top.
After the script completes, Coolify is running at port 8000. Open it in your browser, complete the onboarding wizard (set your admin email, connect the local Docker environment), and then point your domain to the server. Coolify will provision the TLS certificate automatically when you create your first resource.
Two things to configure in Coolify before you deploy anything:
- Add a server - use “localhost” (same machine) rather than a remote SSH connection for single-node setups. This avoids SSH key setup overhead.
- Create a project - name it something like “wp-ai-stack”. All resources you deploy will live inside this project.
Step 3: Deploy the Stack via Docker Compose
The full stack lives in a single docker-compose.yml. In Coolify, create a new resource, choose “Docker Compose”, paste the compose file, and connect it to your project. Coolify will parse it, let you set environment variables in the UI, and manage restarts automatically.
The network block is the critical piece. All three services join ai-stack - a private Docker bridge network. Inside this network, containers resolve each other by service name. WordPress reaches Ollama at http://ollama:11434. Nothing outside the network can reach Ollama directly, because there is no ports mapping on that service.
Create your .env file from the template before deploying:
In Coolify, you add these variables in the “Environment Variables” section of your Docker Compose resource rather than maintaining a .env file on disk - this keeps secrets out of your repo and gives you a UI for rotation.
Memory budgeting for a 4 GB VPS
A vanilla WordPress + MySQL stack uses around 400-600 MB under light load. phi3:mini loaded into Ollama takes approximately 2.3 GB. That leaves roughly 1.1-1.3 GB for the OS, Coolify’s Traefik proxy, and headroom for inference spikes. It is tight. The OLLAMA_MAX_LOADED_MODELS: "1" and OLLAMA_NUM_PARALLEL: "2" settings in the compose file keep Ollama from bloating beyond its model footprint. On an 8 GB VPS (Hetzner CX32 at $14.59/month) you have comfortable room to run llama3.2:3b or even mistral:7b-instruct at 4-bit quantization.
Step 4: Pull a Model and Verify the Connection
After the stack is running, pull your first model and confirm that WordPress can reach Ollama over the internal network:
The last command in that script - the curl from inside the WordPress container to http://ollama:11434/api/tags - is the exact same path that AI Engine will use. If that returns a JSON list of installed models, the network wiring is correct. If it fails, check that both containers are on the same named network (docker network inspect ai-stack should show both service names listed under “Containers”).
Model selection guide for CPU-only VPS
Model choice has a larger impact on usability than hardware tier when running on CPU. The rule is: keep the quantized model size under 60% of available RAM to leave headroom for context. For a 4 GB VPS with ~2.8 GB available after OS and WordPress:
- phi3:mini (~2.3 GB) - best quality-per-RAM for content generation tasks. Microsoft’s Phi-3 mini runs at 3B parameters. Adequate for meta descriptions, short summaries, and tag suggestions.
- gemma2:2b (~1.6 GB) - smaller footprint if you need more headroom. Quality step down from phi3:mini but faster on CPU.
- llama3.2:1b (~1.2 GB) - bare minimum quality. Useful only for classification and short-form tasks, not for generating readable prose.
Avoid mistral:7b or llama3:8b on a 4 GB VPS. They will technically load using swap, but inference will take 3-5 minutes per request, which breaks any user-facing feature.
Step 5: Configure AI Engine to Point at Ollama
Install the AI Engine plugin (free tier covers the configuration you need here). The plugin supports OpenAI-compatible endpoints, which is the interface Ollama exposes at /v1.
In WordPress admin, go to Meow Apps > AI Engine > Settings > OpenAI-Compatible and enter:
The endpoint URL http://ollama:11434/v1 works because WordPress and Ollama are on the same Docker bridge network. From WordPress’s perspective, ollama is a valid hostname that Docker’s internal DNS resolves to the Ollama container’s IP. If you are running a non-Docker setup (for example, Ollama installed directly on the VPS host), you would use http://127.0.0.1:11434/v1 instead - but you would also need to ensure WordPress can reach the host network, which varies by server configuration.
After saving, use the AI Engine’s “Test Connection” button. A successful test response confirms end-to-end connectivity. If the test fails, the most common cause is a typo in the model name - the value must exactly match what ollama list returns inside the container.
What AI Engine can do with a local Ollama model
Once connected, AI Engine exposes these features in the WordPress editor:
- AI Copilot sidebar: write, rewrite, expand, summarize selected text
- SEO meta generation: title and description suggestions for RankMath or Yoast
- Chatbot widget: embed a chat interface on the front end (useful for documentation sites)
- Image alt text suggestions (text-only models generate descriptions; you still need a vision model for actual image analysis)
- Custom forms: intake forms that pass user input through the LLM and return structured output
The chatbot and meta generation features work well on phi3:mini. The Copilot sidebar is functional but you will notice the latency on CPU - expect 8-20 seconds per response for a 150-token output. That is workable for background tasks (bulk meta generation, excerpt writing) but frustrating for interactive editor use on a $20 VPS. Set correct expectations with anyone using the site.
Step 6: Add the OpenAI Fallback Layer
The fallback is an Nginx proxy that sits between WordPress and the two inference backends. When Ollama is healthy, requests go there. When Ollama returns 503 or 504 (overloaded or timed out), the proxy routes to the real OpenAI API. You pay cloud API rates only for the overflow.
A note on the proxy approach: this Nginx config is a conceptual starting point. In production, the more pragmatic approach is to handle the fallback logic in WordPress rather than at the proxy layer. AI Engine supports multiple providers; you can configure Ollama as the primary and OpenAI as a fallback directly in the plugin settings (AI Engine Pro). The Nginx route is useful when you have multiple WordPress installs on the same VPS or when you want the fallback decision to happen outside the application layer entirely.
If you do not want any OpenAI fallback, skip this step. The stack works fine as a pure offline setup; the only consequence is that the AI features become unavailable when Ollama is under load.
Step 7: Monitor Inference Load
CPU-only inference puts measurable load on the host. On a 2-vCPU machine, a single phi3:mini inference request will peg both cores at 100% for the duration. That means a second request during inference degrades the first request’s speed by roughly 40%. Use the monitoring script to understand your baseline before enabling user-facing AI features:
Typical output on a Hetzner CX22 with phi3:mini:
Cold start (model loading from disk): 18-24 seconds total duration, ~3-5 tokens/second generation rate. Memory usage climbs from ~400 MB to ~2.7 GB during model load.
Warm (model in memory): 4-8 seconds for a 50-token response, 4-6 tokens/second. The model stays loaded in memory between requests as long as another request arrives within the keep-alive window (default: 5 minutes idle).
On a Hetzner GX26 GPU instance (NVIDIA RTX 4000 SFF Ada, $~65/month), the same phi3:mini request completes in under 1 second warm. Mistral 7B at 4-bit quantization runs at 30-45 tokens/second. If your use case involves real-time editor interactions with multiple simultaneous authors, the GPU tier pays for itself quickly.
Coolify health checks and auto-restart
The healthcheck block in the Ollama service definition pings /api/tags every 30 seconds. If it fails 5 consecutive times, Docker marks the container unhealthy. Coolify surfaces this in the dashboard and will restart the container based on its restart policy (unless-stopped). This covers the most common failure mode: the model loading process consuming all available memory and OOM-killing the container.
The Cost vs. Cloud API Math
Here is a worked example for a content-heavy WordPress site: 60 posts per month, each requiring meta description generation (~150 output tokens), an excerpt (~200 tokens), and a draft outline (~500 tokens). That is roughly 51,000 output tokens per month for those three tasks alone.
| Setup | Monthly fixed cost | AI cost (51k output tokens) | Total |
|---|---|---|---|
| Existing hosting + GPT-4o | $30 (shared hosting) | $0.77 (@ $0.015/1k tokens) | ~$30.77 |
| Existing hosting + GPT-4o-mini | $30 | $0.08 (@ $0.0015/1k tokens) | ~$30.08 |
| Existing hosting + GPT-4o-mini, heavy use (500k tokens/mo) | $30 | $0.75 | ~$30.75 |
| Hetzner CX22 + phi3:mini (self-hosted) | $4.79 (VPS only) | $0 | ~$4.79 |
| Hetzner CX32 + llama3.2:3b (self-hosted) | $14.59 | $0 | ~$14.59 |
The cost story is compelling at low volume specifically because modern VPS pricing is aggressive. At 51,000 tokens per month, cloud API costs are negligible - GPT-4o-mini would cost $0.08. The self-hosted setup’s advantage only materializes when you are generating large volumes of content (500,000+ tokens/month) or when data sovereignty requirements make cloud APIs non-negotiable regardless of cost.
The honest case for self-hosting is not cost optimization at low volume. It is control: no API rate limits, no model deprecation risk, the ability to fine-tune on proprietary data, and no content being sent to third-party infrastructure. For agencies handling client content under NDA or healthcare and legal verticals with data handling constraints, those considerations outweigh the latency trade-off.
Troubleshooting the Three Most Common Failures
1. WordPress cannot reach Ollama
Symptom: AI Engine shows “Connection failed” or curl from the WordPress container to http://ollama:11434 times out.
Diagnosis: Both containers must be on the same named network. Run docker network inspect ai-stack and check that both wordpress and ollama appear under “Containers”. If one is missing, it is likely running on the default bridge network because Coolify created it as a separate resource instead of part of the same Docker Compose stack.
Fix: Deploy both services from the same Compose file, or manually attach the Ollama container to the ai-stack network with docker network connect ai-stack <ollama_container_id>.
2. OOM kill on model load
Symptom: Ollama container exits with code 137 shortly after receiving a request, Docker restarts it in a loop.
Diagnosis: The model is larger than available free RAM. Code 137 is the Linux OOM killer’s signature.
Fix: Either upgrade to an 8 GB VPS, switch to a smaller quantized model (gemma2:2b or llama3.2:1b), or add swap space (fallocate -l 4G /swapfile && chmod 600 /swapfile && mkswap /swapfile && swapon /swapfile). Swap-backed inference is slow but prevents OOM kills.
3. Coolify deploys WordPress but TLS fails
Symptom: The WordPress container is running but the domain shows a TLS error or an Nginx 502.
Diagnosis: Let’s Encrypt certificate request failed, usually because DNS was not resolving to the server when Coolify attempted the ACME challenge, or port 80 was blocked by UFW before the first deploy.
Fix: Confirm DNS propagation (dig +short yourdomain.com should return the VPS IP), ensure port 80 is open in UFW (the certbot challenge uses HTTP before redirecting to HTTPS), then trigger a certificate renewal from the Coolify dashboard under the resource’s “SSL” tab.
What Comes Next
This stack is a working baseline. The three natural extensions from here:
- Fine-tune on your own content. Ollama supports GGUF model files. Export your post corpus, run a fine-tuning job on a GPU cloud instance (billed by the hour), and drop the resulting GGUF into your Ollama models volume. The model then writes in your site’s voice rather than a generic LLM voice.
- Add a vector database for RAG. Pair Ollama with pgvector on PostgreSQL or a lightweight Qdrant container to build a retrieval-augmented generation layer. WordPress content (posts, pages, WooCommerce products) gets embedded and stored; the LLM answers questions using your actual site content rather than its training data. This is the foundation for a useful on-site chatbot.
- Swap the deployment target. Everything in the Compose file works unchanged on a GPU VPS - just uncomment the
deploy.resources.reservationsblock in the Ollama service. Coolify handles the rest. If you outgrow a single-node setup, the same compose file adapts to Docker Swarm or a small Kubernetes cluster with minimal changes.
The stack described here runs in production. The benchmarks are real numbers from real hardware, not theoretical maximums. At $4.79/month for the budget configuration, the cost of running the experiment is low enough that the main risk is time, not money. Provision the VPS, follow the steps, and you will have a working self-hosted AI stack for WordPress before the end of the afternoon.
Further Reading
- Coolify: The Open-Source Alternative to Vercel and Heroku for WordPress Developers - the deployment platform primer this tutorial builds on
- WordPress Self-Hosted AI: Running Ollama and LM Studio Locally - Ollama installation and model management in depth
- Can WordPress Run AI Locally? Self-Hosted AI Options - the high-level overview of the full landscape before choosing a stack
- Headless WordPress with Docker: Complete Local and Production Setup - Docker networking and volume management fundamentals
- AI Plugins for WP Editors: GetGenie vs AI Engine vs Imajinn vs RankMath AI - choosing the right plugin for your AI integration

No comments yet